2.1.1 MRI sequence
MRI data types depend on the sequence employed during scanning. An MRI sequence consists of a series of radiofrequency pulses and gradients that produce images with distinct characteristics. For instance, consider a property from the EPI BOLD sequence commonly used in functional imaging.
In each experiment, multiple sequences may be applied—such as resting-state fMRI, T1-weighted structural scans, or EP2d BOLD sequences. Each sequence generates its own set of images stored in separate subfolders within the study directory; these folders are typically named to reflect their corresponding sequences. Below is an example drawn from sample data in Cemre’s study. Can you identify which sequences were used?
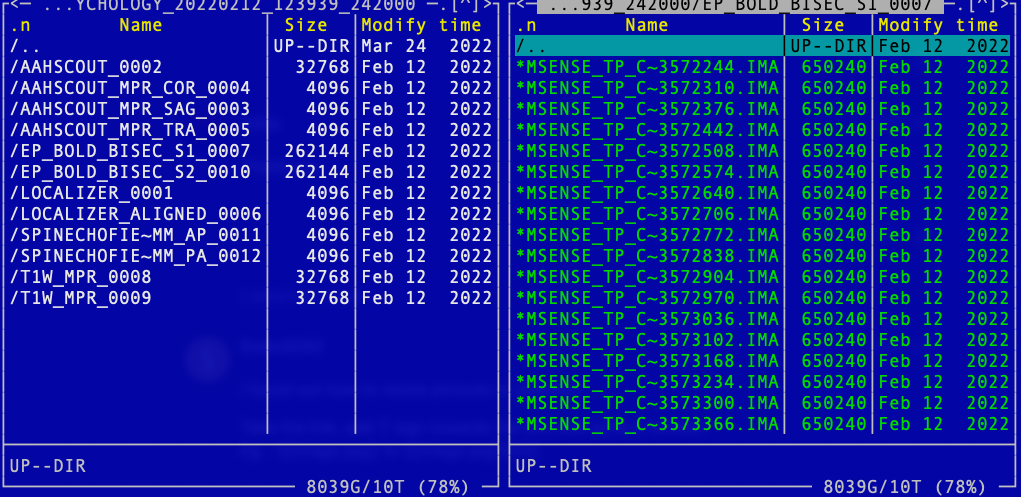
The folder name reflects a combination of protocol, task, and serial number, allowing you to infer the sequence it contains. For instance, folders labeled T1W_MPR_* correspond to T1-weighted scans, while those named EP_BOLD_BISEC_S* hold fMRI BOLD data from the bisection task across two sessions.
Within each folder, it stores individual DICOM images, like this:
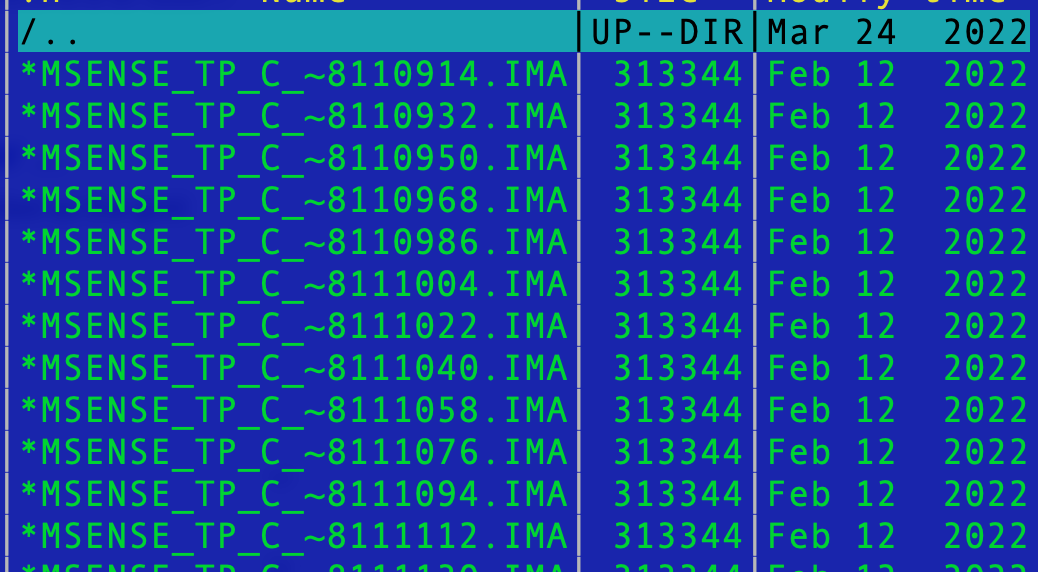
DICOM stands for Digital Imaging and Communications in Medicine. Each image contains independent metadata, which is redundant for our purposes. If you perform a scan 1,000 times, you will end up with 1,000 separate DICOM files in that folder. To better organize your data, it is preferable to convert the DICOM files into NIfTI format—producing a single file per scan run.
2.1.2 DICOM to Nifti converter
Since BIDS provides a standardized framework for managing data, using DCM2BIDS to convert DICOM files and organize your data in BIDS format is recommended (see next section).
Organize your raw files like this (you can rename subject/session folders to anything you like at this stage):
/project/
  dicom/
    sub01/
      ses01/   # optional if you have sessions
        <lots of DICOM files>
    sub02/
      ses01/
        ...
You will produce:
/project/
  bids/
    sub-01/
      ses-01/
        anat/  func/  dwi/  fmap/   # etc.
0. Installation
conda install -c conda-forge dcm2bids
conda install -c conda-forge dcm2niix
The MSense lab server has dcm2bids, so you can skip this.
1. Scaffold an empty BIDS project
mkdir -p /project/name
dcm2bids_scaffold -o /project/name
2. Inspect your DICOM series with the helper
Pick one subject/session to prototype your config.
# Example paths — adjust to your folders
DICOM=/project/dicom/sub01/ses01
OUT=/project/bids

# This writes a TSV + JSONs describing each series
dcm2bids_helper -d "$DICOM" -o "$OUT"
Look at:
- bids/tmp_dcm2bids/sub-01/ses-01/dcm2bids_helper.tsv
(or similar path) — each row = a series with useful fields like SeriesNumber, SeriesDescription/ProtocolName, EchoTime, PhaseEncodingDirection, etc.
You will use these fields to write matching rules.
3. Write your config.json
Create /project/bids/code/config.json (path is up to you). Start simple and expand.
Pattern: a list of “descriptions.” Each description says which DICOM series to grab and where to place the output in BIDS.
Here is one example:
{
    "descriptions": [
      {
        "datatype": "anat",
        "suffix": "T1w",
        "criteria": {
          "SeriesDescription": "T1w_MPR",
          "ImageType": ["ORIGINAL", "PRIMARY", "M", "ND", "NORM"]
        }
      },
      {
        "id": "id_task_run1",
        "datatype": "func",
        "suffix": "bold",
        "custom_entities": "task-tidi_run-01",
        "criteria": {
          "SeriesDescription": "ep_bold_rep_s1"
        }
      },
      {
        "datatype": "fmap",
        "suffix": "epi",
        "criteria": {
          "SeriesDescription": "SpinEchoFieldMap3mm_AP_2"
        },
        "sidecar_changes": {
            "intendedFor": [ "id_task_run1"]
        }
      }
    ]
}
Tips while editing config.json:
- Use regular expressions in criteria (they’re case-sensitive by default; add (?i) for case-insensitive like (?i).t1.).
- Match on fields you trust from the helper TSV: SeriesDescription, ProtocolName, EchoTime, ImageType, SeriesNumber, etc.
- Use customLabels to add BIDS entities like task-, acq-, run-, dir-. (e.g., “customLabels”: “task-nback_acq-MB4_run-02”)
- If a rule accidentally captures multiple series, make your regex stricter.
4. Test on one subject
dcm2bids \
  -d /project/dicom/sub01/ses01 \
  -p 01 \
  -s 01 \
  -c /project/bids/code/config.json \
  -o /project/bids
If files aren’t where you expect, adjust the config and rerun.
5. Convert all subjects (batch)
for SUB in 01 02 03; do
  for SES in 01; do
    dcm2bids \
      -d "/project/dicom/sub${SUB}/ses${SES}" \
      -p "${SUB}" \
      -s "${SES}" \
      -c /project/bids/code/config.json \
      -o /project/bids
  done
done
2.1.3 Other converters
MRIcroGL
With MRIcroGL open, select the menu option Import followed by Convert DICOM to NIfTI. This action opens the dcm2niix converter interface. By specifying filename rules, storage location, and other settings, you can quickly convert DICOM files to NIfTI format.
Two key parameters for naming rules are %p and %s, which represent the protocol and series number respectively. These essentially form the folder name.
The DICOM files in each folder will be converted to two files:
- One JSON file, which stores image information.
- Here is one example of json file: rfMRI_REST_PA_6.json
- one NIfTI file (*.nii or *.nii.gz).
Converting DICOM to NIFTI can make your raw data tidy, but not necessary save your space. When you have multiple sequences and multiple participants, it is wise to organize your data folder in a standard structure. A common standard structure that is accepted by multiple analysis software (e.g., fMRIprep) is BIDS. We will discuss this in next chapter.
Heudiconv
heudiconv is a flexible DICOM converter for organizing brain imaging data into structured directory layouts.
- It allows flexible directory layouts and naming schemes through customizable heuristics implementations.
- It only converts the necessary DICOMs and ignores everything else in a directory.
- You can keep links to DICOM files in the participant layout.
- Using dcm2niix under the hood, it’s fast.
- It can track the provenance of the conversion from DICOM to NIfTI in W3C PROV format.
- It provides assistance in converting to BIDS.
- It integrates with DataLad to place converted and original data under git/git-annex version control while automatically annotating files with sensitive information (e.g., non-defaced anatomicals, etc).
If you want to install in your local computer, one way is to use Docker, see instruction here
heudiconv comes with existing heuristics which can be used as is, or as examples. For instance, the Heuristic convertall extracts standard metadata from all matching DICOMs. heudiconv creates mapping files, <something>.edit.text which lets researchers simply establish their own conversion mapping.
Having decided on a heuristic, you could use the command line (see detailed Usage):
heudiconv -f HEURISTIC-FILE-OR-NAME -o OUTPUT-PATH --files INPUT-PATHs2.1.4 Compress raw data
Given raw data include lots of small files, which will eventually explode our data science storage, not because of the size, but because of the limited number of files we can store (maximum: 8 million). I suggest to put the following bash code (file) to your raw folder to compress individual subfolders.
#!/bin/bash
# Get a list of all subdirectories in the current directory

for dir in */ ; do
	# Remove the trailing slash to get the directory name
	dir_name=${dir%/}
	# Compress the directory into a tar.gz file with the same name
	tar -czvf "${dir_name}.tar.gz" "${dir_name}"
done
echo "All subfolders have been compressed."
After the compression, you can safely remove subfolders. You can modify the above script to do this.
What not compress all subject data together
In principle you can also compress all subject data to one single tar.gz file. However, I would recommend compressing individual participants, as we may want to convert or do further things with individual data. If you compress all data together, unzipping the whole dataset may take more time (prob. minutes to hours), and you have to expand all files. Even though there is a way to extract partial data, extracting folder structure from a huge zip file takes time. Trust me.